


(beta) BERT 上的動態量化
建立於:2019 年 12 月 06 日 | 最後更新:2025 年 1 月 23 日 | 最後驗證:2024 年 11 月 05 日
提示
為了充分利用本教學,我們建議使用此 Colab 版本。這將讓您能夠實驗以下呈現的資訊。
作者:Jianyu Huang
編輯者:Jessica Lin
簡介
在本教學中,我們將在 BERT 模型上應用動態量化,並密切遵循來自 HuggingFace Transformers 範例的 BERT 模型。透過這一步一步的旅程,我們希望展示如何將像 BERT 這樣著名的最先進模型轉換為動態量化模型。
BERT,或來自 Transformer 的雙向嵌入表示,是一種新的預訓練語言表示方法,可在許多流行的自然語言處理 (NLP) 任務(例如問答、文字分類等)上實現最先進的準確性結果。原始論文可以在此處找到。
PyTorch 中的動態量化支援將浮點模型轉換為量化模型,權重使用靜態 int8 或 float16 資料類型,而激活使用動態量化。當權重量化為 int8 時,激活會動態(每個批次)量化為 int8。在 PyTorch 中,我們有 torch.quantization.quantize_dynamic API,它會將指定的模組替換為僅動態權重的量化版本,並輸出量化模型。
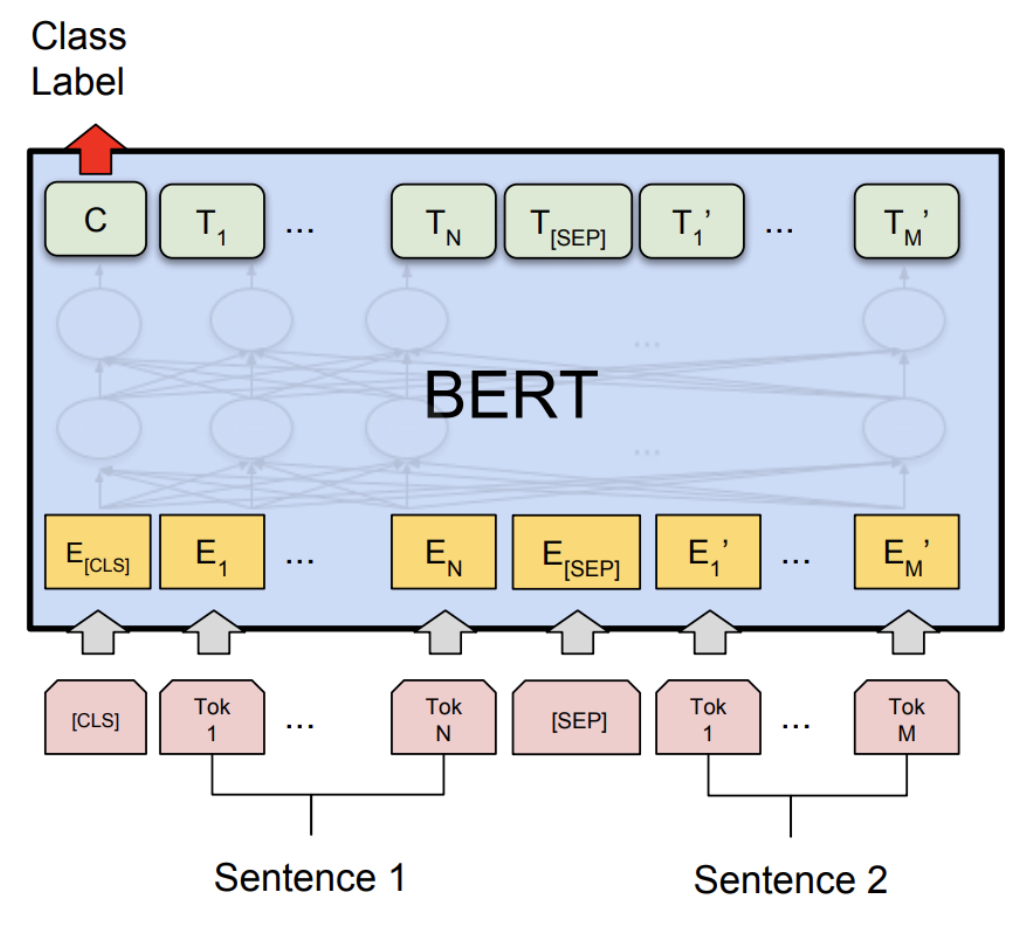
我們展示了在通用語言理解評估基準 (GLUE) 中 Microsoft Research Paraphrase Corpus (MRPC) 任務上的準確性和推論效能結果。MRPC (Dolan and Brockett, 2005) 是一個句子對語料庫,自動從線上新聞來源提取,並人工註釋句子對中的句子是否在語義上等效。由於類別不平衡(68% 正面,32% 負面),我們遵循常見做法並報告 F1 分數。MRPC 是一項常見的語言對分類 NLP 任務,如下所示。
1. 設定
1.1 安裝 PyTorch 和 HuggingFace Transformers
要開始本教學,讓我們首先遵循 PyTorch 此處和 HuggingFace Github Repo 此處的安裝說明。此外,我們也安裝 scikit-learn 套件,因為我們將重複使用其內建的 F1 分數計算輔助函數。
pip install sklearn
pip install transformers==4.29.2
因為我們將使用 PyTorch 的 beta 部分,建議安裝最新版本的 torch 和 torchvision。您可以在此處找到有關本地安裝的最新說明。例如,在 Mac 上安裝
yes y | pip uninstall torch torchvision
yes y | pip install --pre torch -f https://download.pytorch.org/whl/nightly/cu101/torch_nightly.html
1.2 匯入必要的模組
在此步驟中,我們匯入教學所需的 Python 模組。
import logging
import numpy as np
import os
import random
import sys
import time
import torch

from argparse import Namespace
from torch.utils.data import (DataLoader, RandomSampler, SequentialSampler,
                              TensorDataset)
from tqdm import tqdm
from transformers import (BertConfig, BertForSequenceClassification, BertTokenizer,)
from transformers import glue_compute_metrics as compute_metrics
from transformers import glue_output_modes as output_modes
from transformers import glue_processors as processors
from transformers import glue_convert_examples_to_features as convert_examples_to_features

# Setup logging
logger = logging.getLogger(__name__)
logging.basicConfig(format = '%(asctime)s - %(levelname)s - %(name)s -   %(message)s',
                    datefmt = '%m/%d/%Y %H:%M:%S',
                    level = logging.WARN)

logging.getLogger("transformers.modeling_utils").setLevel(
   logging.WARN)  # Reduce logging

print(torch.__version__)
我們設定執行緒數來比較 FP32 和 INT8 效能之間的單個執行緒效能。在本教學的最後,使用者可以透過使用正確的平行後端建置 PyTorch 來設定其他執行緒數。
torch.set_num_threads(1)
print(torch.__config__.parallel_info())
1.3 了解輔助函數
輔助函數已內建在 transformers 程式庫中。我們主要使用以下輔助函數:一個用於將文字範例轉換為特徵向量;另一個用於測量預測結果的 F1 分數。
glue_convert_examples_to_features 函數將文字轉換為輸入特徵
對輸入序列進行 Tokenize;
在開頭插入 [CLS];
在第一個句子和第二個句子之間以及結尾插入 [SEP];
產生 Token type id 以指示 Token 屬於第一個序列還是第二個序列。
glue_compute_metrics 函數使用 F1 分數計算指標,該分數可以解釋為精確度和召回率的加權平均值,其中 F1 分數在 1 時達到最佳值,在 0 時達到最差分數。精確度和召回率對 F1 分數的相對貢獻相等。
F1 分數的方程式為
2. 微調 BERT 模型
BERT 的核心精神在於預訓練語言表示,然後透過在各種任務上微調深度雙向表示,並搭配最少量的任務相關參數,進而達到最先進的成果。在本教學中,我們將著重於使用預訓練的 BERT 模型,在 MRPC 任務上分類語義上等價的句子對。
若要針對 MRPC 任務微調預訓練的 BERT 模型(HuggingFace transformers 中的 bert-base-uncased 模型),您可以參考 examples 中的指令。
export GLUE_DIR=./glue_data
export TASK_NAME=MRPC
export OUT_DIR=./$TASK_NAME/
python ./run_glue.py \
    --model_type bert \
    --model_name_or_path bert-base-uncased \
    --task_name $TASK_NAME \
    --do_train \
    --do_eval \
    --do_lower_case \
    --data_dir $GLUE_DIR/$TASK_NAME \
    --max_seq_length 128 \
    --per_gpu_eval_batch_size=8   \
    --per_gpu_train_batch_size=8   \
    --learning_rate 2e-5 \
    --num_train_epochs 3.0 \
    --save_steps 100000 \
    --output_dir $OUT_DIR
我們在此提供已針對 MRPC 任務微調的 BERT 模型:here。為了節省時間,您可以直接將模型檔案(約 400 MB)下載到您的本地資料夾 $OUT_DIR 中。
2.1 設定全域配置
在此,我們設定全域配置,以便在動態量化前後評估微調後的 BERT 模型。
configs = Namespace()

# The output directory for the fine-tuned model, $OUT_DIR.
configs.output_dir = "./MRPC/"

# The data directory for the MRPC task in the GLUE benchmark, $GLUE_DIR/$TASK_NAME.
configs.data_dir = "./glue_data/MRPC"

# The model name or path for the pre-trained model.
configs.model_name_or_path = "bert-base-uncased"
# The maximum length of an input sequence
configs.max_seq_length = 128

# Prepare GLUE task.
configs.task_name = "MRPC".lower()
configs.processor = processors[configs.task_name]()
configs.output_mode = output_modes[configs.task_name]
configs.label_list = configs.processor.get_labels()
configs.model_type = "bert".lower()
configs.do_lower_case = True

# Set the device, batch size, topology, and caching flags.
configs.device = "cpu"
configs.per_gpu_eval_batch_size = 8
configs.n_gpu = 0
configs.local_rank = -1
configs.overwrite_cache = False


# Set random seed for reproducibility.
def set_seed(seed):
    random.seed(seed)
    np.random.seed(seed)
    torch.manual_seed(seed)
set_seed(42)
2.2 載入微調後的 BERT 模型
我們從 configs.output_dir 載入 tokenizer 和微調後的 BERT 序列分類器模型 (FP32)。
tokenizer = BertTokenizer.from_pretrained(
    configs.output_dir, do_lower_case=configs.do_lower_case)

model = BertForSequenceClassification.from_pretrained(configs.output_dir)
model.to(configs.device)
2.3 定義 tokenize 和評估函數
我們重複使用 HuggingFace 中的 tokenize 和評估函數。
# coding=utf-8
# Copyright 2018 The Google AI Language Team Authors and The HuggingFace Inc. team.
# Copyright (c) 2018, NVIDIA CORPORATION.  All rights reserved.
#
# Licensed under the Apache License, Version 2.0 (the "License");
# you may not use this file except in compliance with the License.
# You may obtain a copy of the License at
#
#     http://www.apache.org/licenses/LICENSE-2.0
#
# Unless required by applicable law or agreed to in writing, software
# distributed under the License is distributed on an "AS IS" BASIS,
# WITHOUT WARRANTIES OR CONDITIONS OF ANY KIND, either express or implied.
# See the License for the specific language governing permissions and
# limitations under the License.

def evaluate(args, model, tokenizer, prefix=""):
    # Loop to handle MNLI double evaluation (matched, mis-matched)
    eval_task_names = ("mnli", "mnli-mm") if args.task_name == "mnli" else (args.task_name,)
    eval_outputs_dirs = (args.output_dir, args.output_dir + '-MM') if args.task_name == "mnli" else (args.output_dir,)

    results = {}
    for eval_task, eval_output_dir in zip(eval_task_names, eval_outputs_dirs):
        eval_dataset = load_and_cache_examples(args, eval_task, tokenizer, evaluate=True)

        if not os.path.exists(eval_output_dir) and args.local_rank in [-1, 0]:
            os.makedirs(eval_output_dir)

        args.eval_batch_size = args.per_gpu_eval_batch_size * max(1, args.n_gpu)
        # Note that DistributedSampler samples randomly
        eval_sampler = SequentialSampler(eval_dataset) if args.local_rank == -1 else DistributedSampler(eval_dataset)
        eval_dataloader = DataLoader(eval_dataset, sampler=eval_sampler, batch_size=args.eval_batch_size)

        # multi-gpu eval
        if args.n_gpu > 1:
            model = torch.nn.DataParallel(model)

        # Eval!
        logger.info("***** Running evaluation {} *****".format(prefix))
        logger.info("  Num examples = %d", len(eval_dataset))
        logger.info("  Batch size = %d", args.eval_batch_size)
        eval_loss = 0.0
        nb_eval_steps = 0
        preds = None
        out_label_ids = None
        for batch in tqdm(eval_dataloader, desc="Evaluating"):
            model.eval()
            batch = tuple(t.to(args.device) for t in batch)

            with torch.no_grad():
                inputs = {'input_ids':      batch[0],
                          'attention_mask': batch[1],
                          'labels':         batch[3]}
                if args.model_type != 'distilbert':
                    inputs['token_type_ids'] = batch[2] if args.model_type in ['bert', 'xlnet'] else None  # XLM, DistilBERT and RoBERTa don't use segment_ids
                outputs = model(**inputs)
                tmp_eval_loss, logits = outputs[:2]

                eval_loss += tmp_eval_loss.mean().item()
            nb_eval_steps += 1
            if preds is None:
                preds = logits.detach().cpu().numpy()
                out_label_ids = inputs['labels'].detach().cpu().numpy()
            else:
                preds = np.append(preds, logits.detach().cpu().numpy(), axis=0)
                out_label_ids = np.append(out_label_ids, inputs['labels'].detach().cpu().numpy(), axis=0)

        eval_loss = eval_loss / nb_eval_steps
        if args.output_mode == "classification":
            preds = np.argmax(preds, axis=1)
        elif args.output_mode == "regression":
            preds = np.squeeze(preds)
        result = compute_metrics(eval_task, preds, out_label_ids)
        results.update(result)

        output_eval_file = os.path.join(eval_output_dir, prefix, "eval_results.txt")
        with open(output_eval_file, "w") as writer:
            logger.info("***** Eval results {} *****".format(prefix))
            for key in sorted(result.keys()):
                logger.info("  %s = %s", key, str(result[key]))
                writer.write("%s = %s\n" % (key, str(result[key])))

    return results


def load_and_cache_examples(args, task, tokenizer, evaluate=False):
    if args.local_rank not in [-1, 0] and not evaluate:
        torch.distributed.barrier()  # Make sure only the first process in distributed training process the dataset, and the others will use the cache

    processor = processors[task]()
    output_mode = output_modes[task]
    # Load data features from cache or dataset file
    cached_features_file = os.path.join(args.data_dir, 'cached_{}_{}_{}_{}'.format(
        'dev' if evaluate else 'train',
        list(filter(None, args.model_name_or_path.split('/'))).pop(),
        str(args.max_seq_length),
        str(task)))
    if os.path.exists(cached_features_file) and not args.overwrite_cache:
        logger.info("Loading features from cached file %s", cached_features_file)
        features = torch.load(cached_features_file)
    else:
        logger.info("Creating features from dataset file at %s", args.data_dir)
        label_list = processor.get_labels()
        if task in ['mnli', 'mnli-mm'] and args.model_type in ['roberta']:
            # HACK(label indices are swapped in RoBERTa pretrained model)
            label_list[1], label_list[2] = label_list[2], label_list[1]
        examples = processor.get_dev_examples(args.data_dir) if evaluate else processor.get_train_examples(args.data_dir)
        features = convert_examples_to_features(examples,
                                                tokenizer,
                                                label_list=label_list,
                                                max_length=args.max_seq_length,
                                                output_mode=output_mode,
                                                pad_on_left=bool(args.model_type in ['xlnet']),                 # pad on the left for xlnet
                                                pad_token=tokenizer.convert_tokens_to_ids([tokenizer.pad_token])[0],
                                                pad_token_segment_id=4 if args.model_type in ['xlnet'] else 0,
        )
        if args.local_rank in [-1, 0]:
            logger.info("Saving features into cached file %s", cached_features_file)
            torch.save(features, cached_features_file)

    if args.local_rank == 0 and not evaluate:
        torch.distributed.barrier()  # Make sure only the first process in distributed training process the dataset, and the others will use the cache

    # Convert to Tensors and build dataset
    all_input_ids = torch.tensor([f.input_ids for f in features], dtype=torch.long)
    all_attention_mask = torch.tensor([f.attention_mask for f in features], dtype=torch.long)
    all_token_type_ids = torch.tensor([f.token_type_ids for f in features], dtype=torch.long)
    if output_mode == "classification":
        all_labels = torch.tensor([f.label for f in features], dtype=torch.long)
    elif output_mode == "regression":
        all_labels = torch.tensor([f.label for f in features], dtype=torch.float)

    dataset = TensorDataset(all_input_ids, all_attention_mask, all_token_type_ids, all_labels)
    return dataset
3. 應用動態量化
我們在模型上呼叫 torch.quantization.quantize_dynamic,以便在 HuggingFace BERT 模型上應用動態量化。具體來說,
我們指定希望量化模型中的 torch.nn.Linear 模組;
我們指定希望將權重轉換為量化的 int8 值。
quantized_model = torch.quantization.quantize_dynamic(
    model, {torch.nn.Linear}, dtype=torch.qint8
)
print(quantized_model)
3.1 檢查模型大小
讓我們先檢查模型大小。我們可以觀察到模型大小顯著減少(FP32 總大小:438 MB;INT8 總大小:181 MB)
def print_size_of_model(model):
    torch.save(model.state_dict(), "temp.p")
    print('Size (MB):', os.path.getsize("temp.p")/1e6)
    os.remove('temp.p')

print_size_of_model(model)
print_size_of_model(quantized_model)
本教學中使用的 BERT 模型(bert-base-uncased)的詞彙量 V 為 30522。在 embedding 大小為 768 的情況下,word embedding 表的總大小約為 4 (Bytes/FP32) * 30522 * 768 = 90 MB。因此,在量化的幫助下,非 embedding 表部分的模型大小從 350 MB(FP32 模型)減少到 90 MB(INT8 模型)。
3.2 評估推論準確度和時間
接下來,讓我們比較原始 FP32 模型和動態量化後 INT8 模型之間的推論時間以及評估準確度。
def time_model_evaluation(model, configs, tokenizer):
    eval_start_time = time.time()
    result = evaluate(configs, model, tokenizer, prefix="")
    eval_end_time = time.time()
    eval_duration_time = eval_end_time - eval_start_time
    print(result)
    print("Evaluate total time (seconds): {0:.1f}".format(eval_duration_time))

# Evaluate the original FP32 BERT model
time_model_evaluation(model, configs, tokenizer)

# Evaluate the INT8 BERT model after the dynamic quantization
time_model_evaluation(quantized_model, configs, tokenizer)
在 MacBook Pro 上本地執行時,不進行量化的情況下,推論(針對 MRPC 資料集中的所有 408 個範例)大約需要 160 秒,而進行量化的情況下,大約只需要 90 秒。我們總結了在 Macbook Pro 上執行量化 BERT 模型推論的結果如下:
| Prec | F1 score | Model Size | 1 thread | 4 threads |
| FP32 |  0.9019  |   438 MB   | 160 sec  | 85 sec    |
| INT8 |  0.902   |   181 MB   |  90 sec  | 46 sec    |
在對 MRPC 任務上微調後的 BERT 模型應用訓練後動態量化後,我們的 F1 分數準確度降低了 0.6%。作為比較,在最近的一篇論文中(表 1),透過應用訓練後動態量化達到了 0.8788,透過應用量化感知訓練達到了 0.8956。主要區別在於我們在 PyTorch 中支援非對稱量化,而該論文僅支援對稱量化。
請注意,我們在本教學中將線程數設定為 1,以便進行單線程比較。我們也支援這些量化 INT8 運算子的運算內平行化。使用者現在可以透過 torch.set_num_threads(N) 設定多線程(N 是運算內平行化線程的數量)。啟用運算內平行化支援的一個初步要求是用正確的後端(例如 OpenMP、Native 或 TBB)建置 PyTorch。您可以使用 torch.__config__.parallel_info() 檢查平行化設定。在同一台 MacBook Pro 上,使用帶有 Native 後端進行平行化的 PyTorch,我們大約可以在 46 秒內完成 MRPC 資料集的評估處理。
3.3 序列化量化模型
在追蹤模型後,我們可以使用 torch.jit.save 將量化模型序列化並儲存,以供日後使用。
def ids_tensor(shape, vocab_size):
    #  Creates a random int32 tensor of the shape within the vocab size
    return torch.randint(0, vocab_size, shape=shape, dtype=torch.int, device='cpu')

input_ids = ids_tensor([8, 128], 2)
token_type_ids = ids_tensor([8, 128], 2)
attention_mask = ids_tensor([8, 128], vocab_size=2)
dummy_input = (input_ids, attention_mask, token_type_ids)
traced_model = torch.jit.trace(quantized_model, dummy_input)
torch.jit.save(traced_model, "bert_traced_eager_quant.pt")
若要載入量化模型,我們可以使用 torch.jit.load
loaded_quantized_model = torch.jit.load("bert_traced_eager_quant.pt")
結論
在本教學中,我們示範了如何將像 BERT 這樣著名的最先進 NLP 模型轉換為動態量化模型。動態量化可以減小模型的大小,同時對準確性僅產生有限的影響。
感謝您的閱讀!和往常一樣,我們歡迎任何意見反應,因此如果您有任何問題,請在此處建立 issue:here。
參考文獻
[1] J.Devlin, M. Chang, K. Lee and K. Toutanova, BERT: Pre-training of Deep Bidirectional Transformers for Language Understanding (2018).
[3] O. Zafrir, G. Boudoukh, P. Izsak, and M. Wasserblat (2019). Q8BERT: Quantized 8bit BERT.
